2025 Handover Inspection Tips for New Homes: Catch Issues Before It’s Too Late

Found Termites in a Pre-Purchase Inspection? What to Do Next
October 13, 2025
Ultimate Pre-Plaster Inspection for Houses in Melbourne
October 27, 2025
The big day is here! After waiting for what seems like forever, making tons of choices, and watching your house go up, the builder says it’s just about done. You’re almost there, with the keys nearly in your hands. It’s a super exciting time.
But when people are so ready to move in, they mess up. They think new means flawless.
In 2025, getting materials has been hard, plus there aren’t enough workers, and deadlines are tight. Things might get a little rushed, and some minor mistakes could happen. Your builder did their job, sure, but now it’s your turn. The handover inspection for new home is super important. It’s your best shot to spot and write down every problem, from big to small, before you sign anything.
After you sign, things change big time. Trying to get the builder back to fix stuff? It can be a pain. This guide has tips to check everything over so your house is what you expected.
What is a Handover Inspection and Why is it So Critical?
The handover inspection is when you and the builder walk through your new house. You’re looking for anything that’s not done right or is missing based on your agreement and the building rules. Basically, you’re making a list of stuff the builder needs to fix before you pay them the final amount.
Why is this so important? Well, after you move in, it’s hard to prove if any damage was there before or if you caused it. If it’s not on the handover report, fixing it becomes a pain and goes into a Defect Liability Period, which can take forever. Getting it all sorted before you take ownership means the builder *has* to fix it, no arguments.
The Ultimate 2025 Handover Inspection Checklist
To the untrained eye, a new home looks clean and finished. To a professional, it’s a long list of checkable items. Come prepared. Bring a notebook, a phone (for photos), a small phone charger to test power points, and even a spirit level if you have one. Here is a room-by-room guide on what to look for:
1. The Exterior: The First Impression and Property Boundary
Don’t be distracted by the fresh paint; look closely at everything that forms the shell of your home.
- Brickwork & Mortar: Inspect for consistent mortar joints, missing mortar, significant chips or cracks in the bricks. Ensure “weep holes” (small gaps in mortar allowing moisture to escape) are present, clear, and correctly spaced above all windows, doors, and at the base of walls.
- Paint & Render: Examine walls for drips, paint overspray on windows, paths, or adjacent surfaces, inconsistent colour patches, and any “chatter marks” (ripples or unevenness) in the render.
- Roof, Gutters & Downpipes: From the ground, visually inspect the roof for displaced or broken tiles, or damaged metal sheeting. Check that all gutters are straight, free of debris, and have the proper “fall” (slope) towards downpipes. Are all downpipes properly connected, secured, and draining effectively away from the foundation?
- Windows & Doors (External): Test every window and external door. Do they open, close, and lock smoothly without sticking or excessive force? Are all locks functional and are keys provided? Is the sealant (silicone or caulk) around the frames neat, complete, and watertight? Check for scratches or chips on glass.
- Driveway & Paths: Look for any significant cracks, spalling (flaking concrete), uneven sections, or areas where water might pool. Ensure the finished level of the concrete is appropriate for drainage, sloping away from the house.
- Fencing, Gates & Landscaping: Verify that any fencing, gates, turf, and garden beds included in your contract are complete, installed correctly, and free from damage. Check that gates open and close freely and latch securely.
- External Fixtures: Test outdoor lights, taps (for leaks and pressure), and power points (if applicable). Ensure any clotheslines, letterboxes, or external antennae are installed as per your plans.
2. The Interior: The Fine Details of Living Spaces
This is where small cosmetic defects love to hide, and where your daily experience will be shaped.
- Walls & Ceilings: Walk through each room. Look at the walls and ceilings from various angles, especially with light reflecting off them, to spot imperfections in the plaster, visible joins, cracks, and the overall paint finish. Check for scuffs, dents, nail pops, and poor patch-up jobs.
- Flooring: For tiled areas, check for lippage (uneven tile edges), chipped or cracked tiles, and consistent, clean grout lines. On timber or laminate floors, look for gaps between boards, scratches, spongy sections, or excessive movement. On carpet, check that it’s properly laid, taut at the edges, and free from ripples, stains, or damage.
- Internal Doors: Open and close every single internal door. Do they latch properly? Do they scrape on the floor or frame? Are the hinges tight, and are the handles secure and aligned? Check that all keys (if applicable) are provided and work.
- Skirting Boards & Architraves: Inspect for consistent gaps, neat joins, straightness, and a complete, even paint finish.
3. The “Wet Areas”: Kitchens, Bathrooms & Laundry – High-Risk Zones
These areas are subject to water and heavy use, making thorough checks crucial.
- Taps & Plumbing: Turn on every single tap (sink, shower, bath). Check for hot and cold water (test both). Check the water pressure. While the tap is running, look in the cabinet underneath for any leaks from the pipes or connections.
- Toilets: Flush every toilet. Check that it stops running properly, the cistern is secure, and there’s no leak at the base.
- Sinks & Baths: Check that all sinks, basins, and baths drain properly. Look for chips, scratches, or cracks in the enamel or porcelain.
- Showers: Pay close attention to the silicone seals in the shower recess and around the bath. Are they neat, complete, and watertight? Is the shower screen installed correctly and operating smoothly? Check for adequate fall in the shower base to the drain.
- Cabinetry: Open every single drawer and cupboard door. Do they open and close smoothly? Do “soft-close” mechanisms work correctly? Are all handles secure and aligned? Check for chips, scratches, or alignment issues.
- Ventilation: Turn on every exhaust fan (bathroom, laundry, kitchen). Ensure they are working effectively. In 2025, good ventilation is a non-negotiable part of the building code to prevent mould and manage internal air quality.
4. The Services & Systems: The Engine Room of Your Home
Don’t just look at them test them all!
- Electrical Outlets: This is what the phone charger is for. Go to every single power point, plug your charger in, and check that it works. Test any RCD (safety switch) buttons in the switchboard.
- Lighting: Turn every light switch on and off. Check that all light fittings are installed and functional.
- Appliances: If appliances (oven, cooktop, dishwasher, rangehood) are installed by the builder, turn them on. Run a quick rinse cycle on the dishwasher, turn on the oven, and test all cooktop burners.
- Heating & Cooling: Turn the system on and check that air comes out of all designated vents. Test both the heating and cooling functions.
- Hot Water: Check that the hot water system is installed and working, and that hot water actually reaches all taps.
- Smoke Detectors: Check that smoke detectors are installed in appropriate locations as per code.
5. The “Hidden” Areas: The Roof Void & Sub-Floor
These areas are often overlooked but can hide significant issues. This is where a professional inspector is particularly invaluable.
- Roof Void (Attic): If you can safely access it, poke your head through the manhole. Can you see insulation spread evenly across the entire ceiling? Are there any visible light coming through the roof tiles (a potential leak)? Is there any construction debris left behind?
- Sub-Floor (if applicable): If your home has a sub-floor, check for adequate ventilation, signs of excessive moisture, and ensure all construction debris has been removed. Leftover timber against the house is a huge invitation for pests.
- Debris Removal: Generally, check that the builder has removed all their rubbish and construction debris from around the property, not just inside.
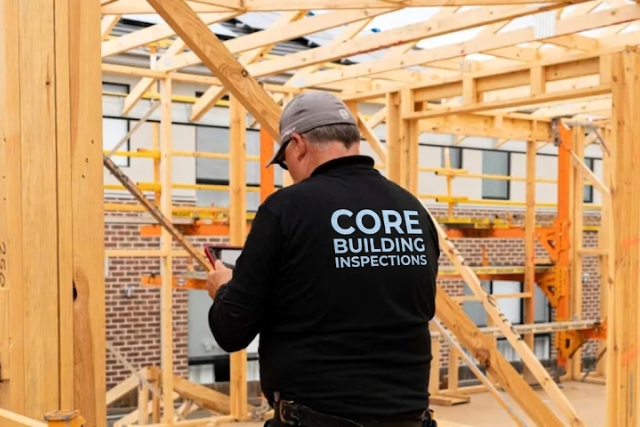
Why a Professional Inspector is Your Best Bet
You’re a new homeowner, right? Doing your own walkthrough is a good idea. Just remember, you’re not a pro. There’s a difference between your look-around and a real inspection. If you’re buying an older place in Melbourne or Victoria, a pre-purchase inspection checks for wear and tear, seeing how much life is left in the house.
If it’s a brand-new home, a handover inspection is what you need. These guys really check the quality against strict rules. A pro inspector doesn’t have feelings about the place. They’re a neutral party, paid to find problems. They know all the codes and standards, and what builders sometimes skip. You’ll get a detailed report with photos and code stuff that builders can’t brush off. That report gives you some serious power.
You’ve Found Defects. What Now?
This is the most important part. As you (or your inspector) find issues, document them methodically.
- Create a Detailed List: Write everything down, room by room, including location and a brief description of the defect.
- Take Clear Photos/Videos: A picture (or video) is worth a thousand words and provides undeniable evidence.
- Present the Report Formally: Submit your detailed defect list (or your inspector’s professional report) to your builder’s site supervisor. Ensure you keep a copy.
- DO NOT SIGN or Pay: Critically, do not sign the final handover documents or make the final payment until the builder has rectified all agreed-upon defects, or you have a clear, written, signed agreement on exactly when they will be fixed. This final payment is your ultimate leverage.
Conclusion: Start Your New Life on the Right Foot
Buying a house is probably the biggest money move you’ll ever make, so spending a little extra time checking it out is smart. If you’re careful, follow a system, and maybe even get a pro inspector, you can spot problems before they’re yours to fix. It’s not about being a pain; it’s just being smart. It’s the last thing you do to be sure your builder kept their word, so you can get those keys feeling good.
Frequently Asked Questions (FAQs)
Q1: What is “Practical Completion”? This is a contractual term meaning your home is “complete and fit for its intended purpose,” even if minor defects exist. The builder then issues the final invoice and schedules the handover inspection.
Q2: Can I just do the handover inspection myself? You should definitely perform your own walkthrough using a checklist. However, a professional inspector possesses the training, experience, and knowledge of building codes to identify critical issues an untrained eye would miss, providing an authoritative report for the builder.
Q3: What if the builder disputes the defects I’ve listed? A professional inspector’s report, supported by photos and references to the National Construction Code (NCC) or Australian Standards, is difficult for a builder to dispute. If conflicts persist, your state’s building authority (e.g., the Victorian Building Authority) can offer mediation.
Q4: How long does a professional handover inspection typically take? For an average 3-4 bedroom home, a thorough professional inspection can take between 2 to 4 hours, as every accessible component and system is meticulously examined.
Q5: What’s the key difference between a handover inspection and the builder’s warranty? The handover inspection focuses on identifying and rectifying defects before you take legal possession and make the final payment. The builder’s warranty covers new defects that arise after you move in. Addressing issues pre-handover is always significantly easier and more effective.
Q6: What should I bring to the inspection? A notebook, pen, fully charged smartphone (for photos/videos), a small phone charger (to test power points), and potentially a spirit level. If using a professional inspector, they bring all necessary tools.